On this page we will achieve together two things:
- Tutorial => even create your coldboots that means changing the image and audio start your console
- For those who just want to change the audio and picture to start the console by coldboots already compiled (easier) go to step 3.
Here's a video to show you what we can do for example:
Pre-requisites:
* Lots of patience and coffee ^ ^
* A USB drive formatted in fat32
* A jailbroken PS3 (cracked)
* Dev_blind v1.1: dev_blind-v1.1.zip
* OpenPS3FTP: openps3ftp-v1.5.zip
* Download Coldboot install: Coldboot_Installer_1.0.rar
* Audacity: HERE
* Photoshop (if you do not already have it I will put a link to the trial version with which I made this tutorial and I used the 32-bit version on a Windows 7 64 bit because beugs with the 64-bit version of photoshop: HERE )
* DDS photoshop plugin: HERE
* Simplyzip: simplyzipse.exe
* Boot Logo Créator: HERE
* XviD4PSP: HERE
* Filezilla: HERE
Preparation:
* Unzip Coldboot_installer_1.0 and Dev_Blind and Open_PS3FTP you download, copy / paste the files that match the packages firmware your PS3 on your USB formatted in FAT32.
* Turn on your console, connect your USB drive on your console and then install the packages by Install_package_file
On your PC:
* Unzip Boot Logo Créator on your desktop, you will get a folder Boot logo creator
* Install Photoshop
* Install the DDS Plugin Photoshop
* Install exe Simplyzip
* Install Filezilla
* Install Audacity
* And finally install XviD4PSP
Step 1: Change images Coldboot
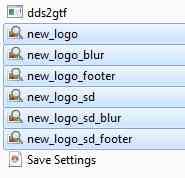
* Get into the folder Boot Logo Creator you unzip on your desktop and in Boot Logo's (dds's) , you will find 6 files DDS type, in this set of 6 files there are 3 files for HD screens (1080.1080 i and 720p) and SD for three other screens, the first three are for the HD as shown below (this is the info, close after seeing what that is):

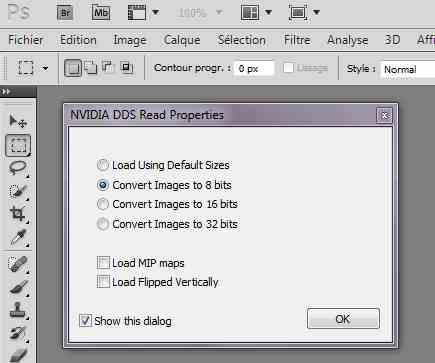
* Launch Photoshop, and in the horizontal menu click File then open and locate the first file (among the six) that you want to change, so in my example I took the first of the "new_logo" list, a window opens then select the 8 bit and be OK (NOTE: I changed the first two of each Cathegory) :
* The image is displayed in photoshop (note mine is already changed many-sure)

* Now you need to change the dds 6 pictures as you want, by cons especially not change the resolution (size), otherwise it will not work and will not turn color as the ps3 supported by the image must be in black / white.
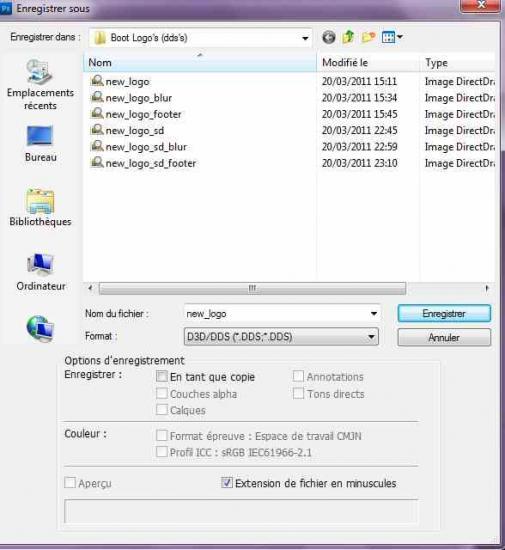
* When you modify an image, then save in the same folder where you took to replace the old with yours. (To register go to File=> Save As, select the folder Boot Logo's (dds's) and do not forget to set the format before on DDS as below:
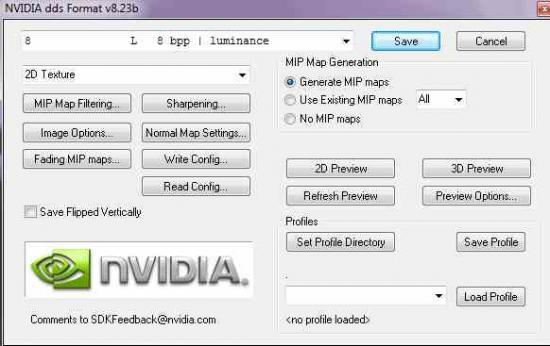
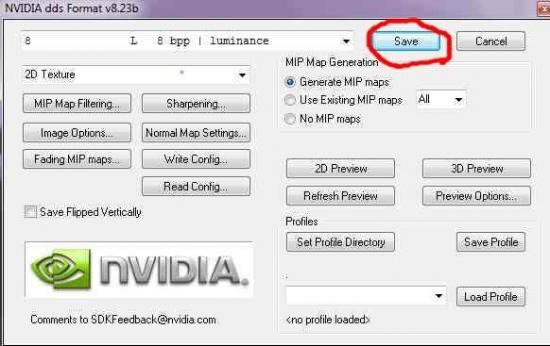
* A new window opens (the Photoshop Plugin), set the parameters as shown in the image below:
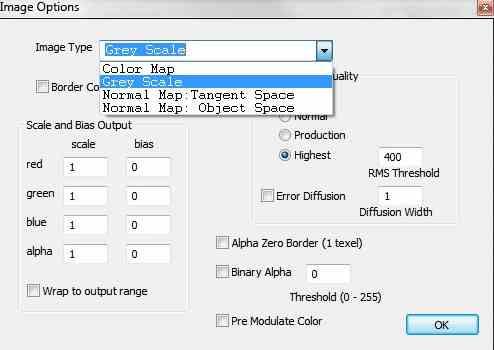
* Then click Image Options ... and set the parameters as below and do OK and close this window:
* Then click on " save "to complete registration (Renew this recording method for 6 pictures you have changed):
Step 2: Encoding modified RAF size image
* In the file Boot logo Créator go into boot logo's (dds's) then select the six logos and made them onto dd2gtf :
* What you have to give it then:

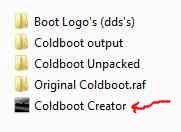
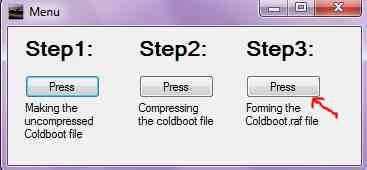
* This extends, launch Coldboot creator (double clicked) that also in this case the boot logo creator:
* A window opens, click the PRESS which is below Step 1:

* Another window opens in which you will have to make some adjustment:
1 Click Browe then locate the file " coldboot_edit_unpacked "that it is in your file Boot Logo creator => coldboot_edit_unpacked=> coldboot_edit_unpacked and made open .
2 Click sue Browe for each row and find your edited image at size gtf which is what is required.
3 Click Browe and choose the location to save
4 Click START to finish (with a window ouvriera wrote "Success" made OK and close the window is as follows:

* Leave this window open below for the moment:
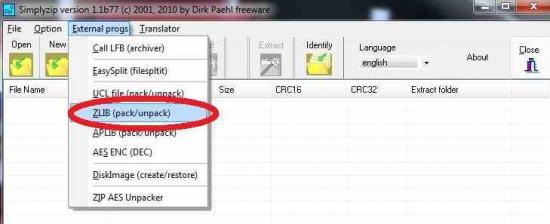
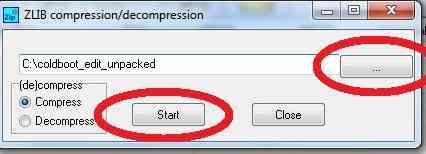
* Now run Simplyzip and go dansExternal progs and click ZLIB (pack / unpack)
* A window opens, click on the box that has 3 points and go for your coldboot file that this is where you the have saved in Step 1and then to START then close Simplyzip.
* Now in this window you left open click PRESS below Step 3 :
* Another window opens in which we do this:
1 Click Browe and pick up your file coldboot_edit_unpacked.zlp that it is in your file Boot logo creator / coldboot_edit_unpacked/ coldboot_edit_unpacked.zlp and make Open.
2 Click Browse and find the file coldboot is in Boot Logo creator / Original Coldboot.raf / coldboot and make Open .
3 Click browse and designated location to save your change and a name coldboot.raf to him, I suggest you give it the name ofcoldboot which will prevent you rename thereafter.
4 Click FINISH

Step 3: Replace the original coldboot your console by your
For those who have chosen to install pre-compiled coldboot, download a pack LA or mineColdboot_Arachetous_Yin_Yang.zip or . coldboot_Cannabis pack-Style-by Arachetous , then follow this tutorial to install (Note: To install the audio coldboots This is the same method)
* Turn on your PS3 and run Dev_blind that you installed in step one of this tutorial, once started to YES , then again YES then make ROUND to exit.
Which will be that it will put in Filezilla in Host: * Run OpenPS3FTP and watch the displayed IP (192.168.1.13 exp) address.
* On your PC, launch Filezilla in the box to host => address IP Console / identifier in place => root / password set in => openbox/ put in Port => 21 then click QUICK CONNECTION

* On the right side of filezilla is the console on the left side is your PC.
* Go to the side Dev_blind => VSH => resource => and then search the list the coldboot your console and side left pick up yourmodified coldboot.
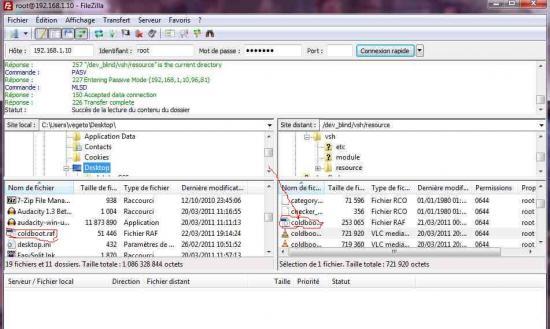
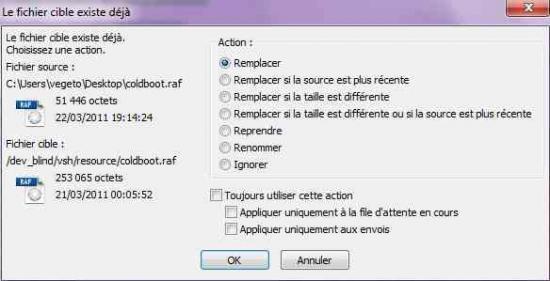
* As far left , put on your coldboot and made a right click and choose Send and select replace the existing file with the same name and do OK .
ENJOY you finally have your coldboot installed in the console, and close filezilla console OpenPS3FTP leave.
* Turn off the console and restart it, you should see your changes at the start ^ ^
Step 4: Create the audio coldboots
- include:
The PS3 uses a AC3 format that has a frequency of 48,000 Hz and a throughput of 640 KB / s. On the PS3 it is a stereo file and another 5.1 which is called:
- Coldboot_stereo.ac3
- Coldboot_multi.ac3
The duration of the startup sound is 8 seconds.
1 On the PC, launch Audacity:

2 Click File then Open and choose the music you want to take a 8 9 seconds (note: your music to be imported must be in WAV format and quality)
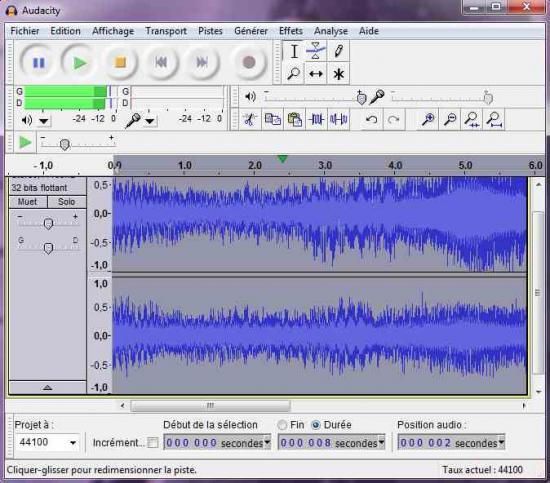
3 Once you open it in Audacity music will falloire choose your path from August to September dry (anyway even if it is too long then you will see modifira), then just click the selection tools ( 1 on the image below) and then double click the icon and then move your sound labarre which appear to select your song ( two on the picture below) then you can listen by clicking on the Play just above the bar, the play which is not all at the top.
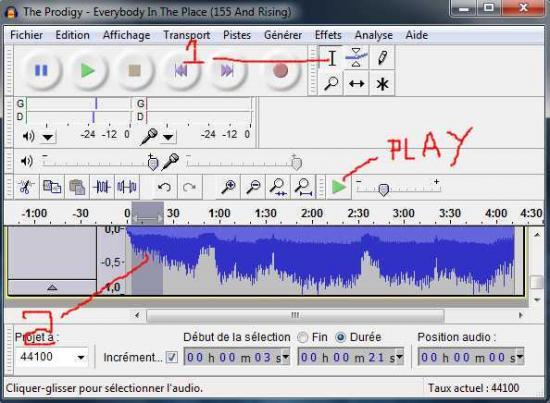
4 click on Edit then select COPY from the menu after opening a second time using Audacity shortcut Audacity (do not close the first ok)
5 In your Audacity you open the second, go to Edit and choose PASTE , your chip selects before appears. Now you can shorten it if necessary and listen, add effects ect ... (Note: there you can close the Audacity you opened first)
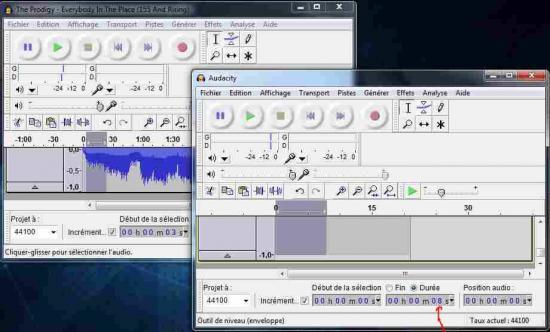
6 Once your song ready, go to File and choose Export selection and export your Son by giving it a name and location to save it, do not change the format and then close when finished. (Note the red arrow on the picture above, my piece is 8 seconds)
7 Now start XviD4PSP, slipped made / submitted your song and choose AC3 640K:

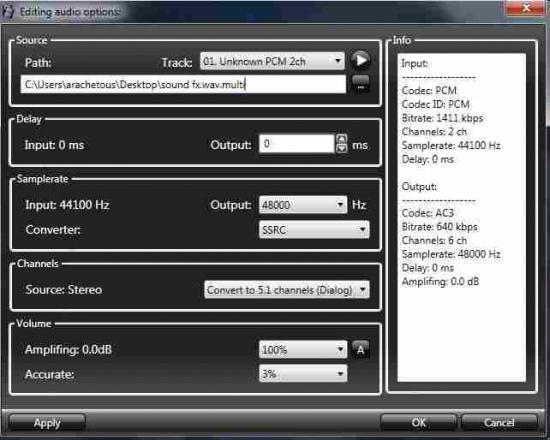
8 Then go to Audio and Audio encoding settings and adjust it exactly like the picture below in the box patch , added the wordstereo in the name of your song, and then click Apply then OK
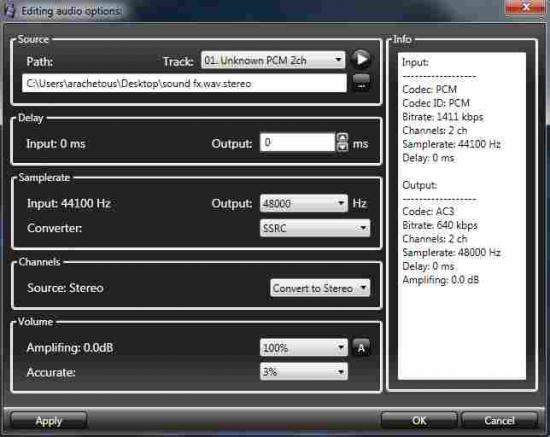
9 Now click ENCODE , it will ask you for a name, put " coldboot_stereo ", choose where to save and to save
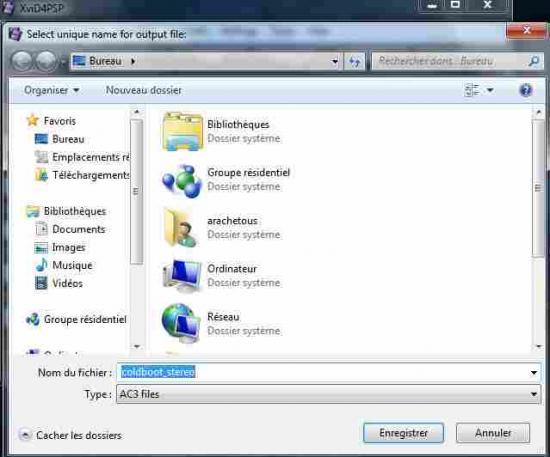
10 Made drag / drop your piece of music you have modified Audacity again in XviD4PSP, then go to Audio and Audio Editing and set the parameters exactly like the picture below, then in the box patch added the word " multi "in the name of your song and click Apply then OK
11 Click ENCODE , it will ask you for a name, put " coldboot_multi "and select the location to save and click save.

Now you have your two coldboots ready, now go back to step 3 to install the console, it is the same method as for the coldboot Image to install ^ ^
No comments:
Post a Comment